Merge accounts
The method described below allows you to manually transfer a mailbox account. Manual data migration is always possible via backup and subsequent import. For technical reasons, we are unfortunately unable to transfer data automatically.
A Backup Protects Against Data Loss
- Create a backup of your data. You can import this data later into the newly created account. Without a backup, there is a risk of permanent data loss.
- Shared resources such as calendars or file shares will no longer be accessible after the change. You will need to restore them from the backup and share them again.
- If the administrator account in a shared billing setup is deleted, all linked accounts and contracts of any sub-accounts will be deleted as well.
Prepare an Existing Email Address for Use in a Team or Family Account
If you would like to move an existing email address to a team or family account at mailbox, you must first release that address. Please follow these steps:
-
Create a backup:
Save your personal data (e.g. emails, files, calendars) in case you need it later in the team or family account. -
Change the alias:
- Create a new alias and set it as the new primary address of your account.
- Then remove the previous primary alias — that is, the email address you now wish to use within the team or family account.
-
Use the address in the team or family account:
You can now assign the released email address to a user in the desired team or family account.
Please note: Careful preparation and backup are essential to ensure a smooth transition without data loss.
Reassign Alias Immediately
Once deleted, an alias becomes available to all users. You should reassign it to your account immediately to prevent someone else from claiming it.
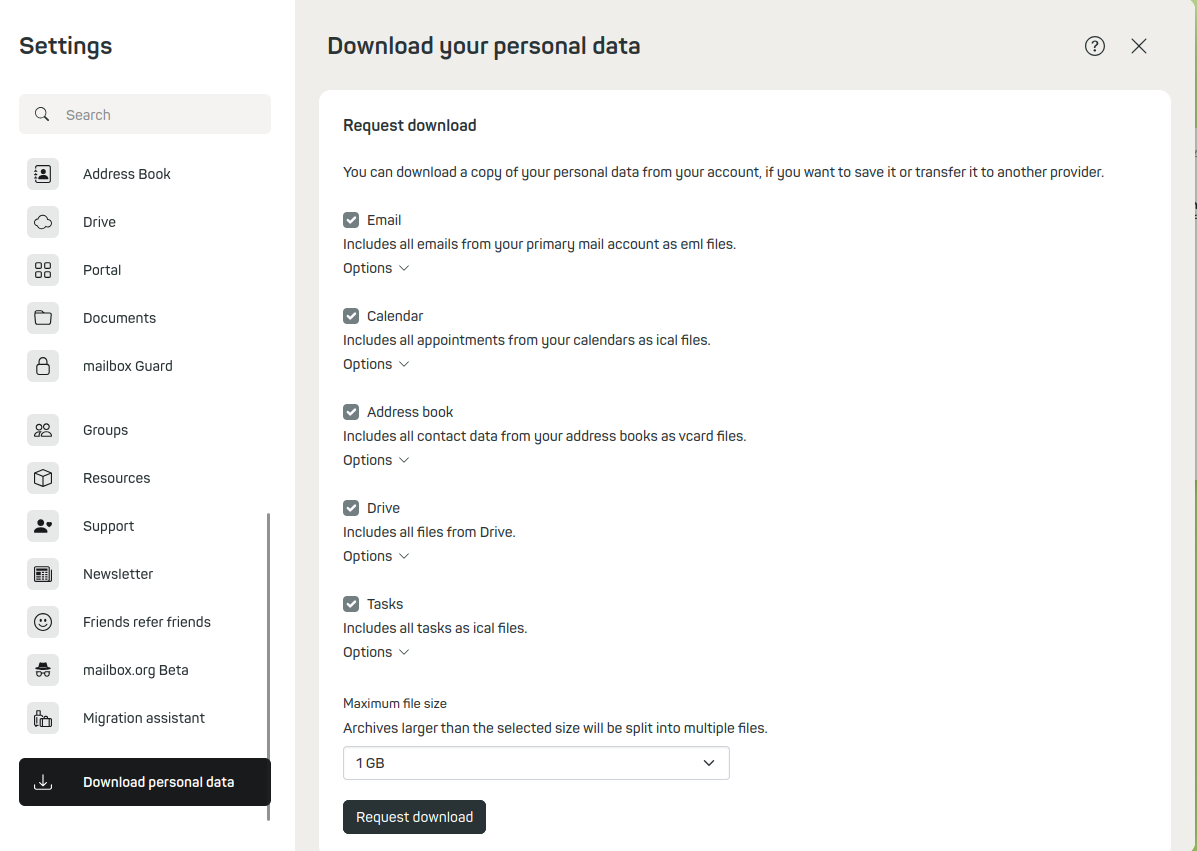
Be sure to back up all emails, contacts, calendars, tasks, and Drive data in your mailbox — for example, using the corresponding option in the mailbox settings (see Figure 1). For further guidance, please refer to the article: Backup and Restore Your Data

Figure 1: Data backup with mailbox.
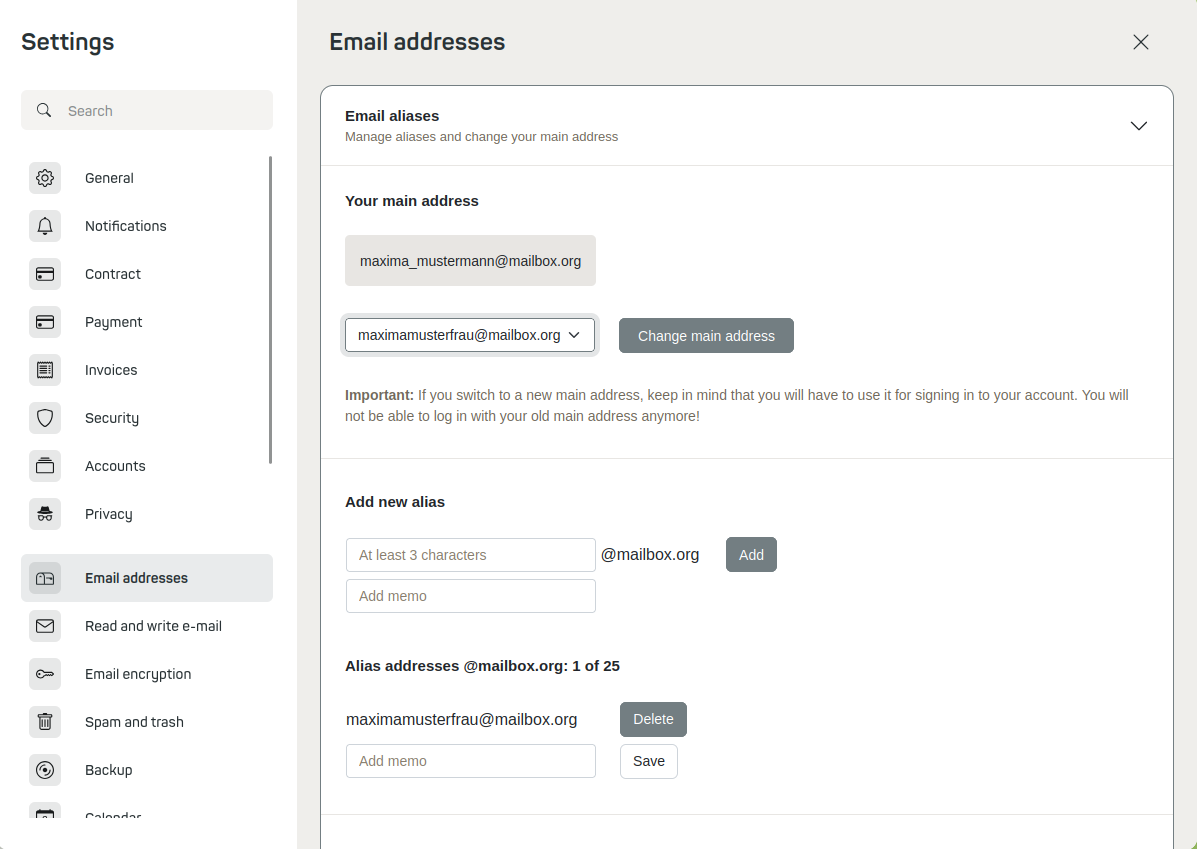
Create an alias for this mailbox via All Settings | Email Addresses | Email Aliases and set this newly created alias as the new primary email address.
Now log out and sign back in using the new primary email address. To remove the original email address from your list of aliases, go to All Settings | Email Addresses | Email Aliases, select the old address and click Delete. (Figure 2)

Figure 2: Add a new alias and make it the new primary address for the account.
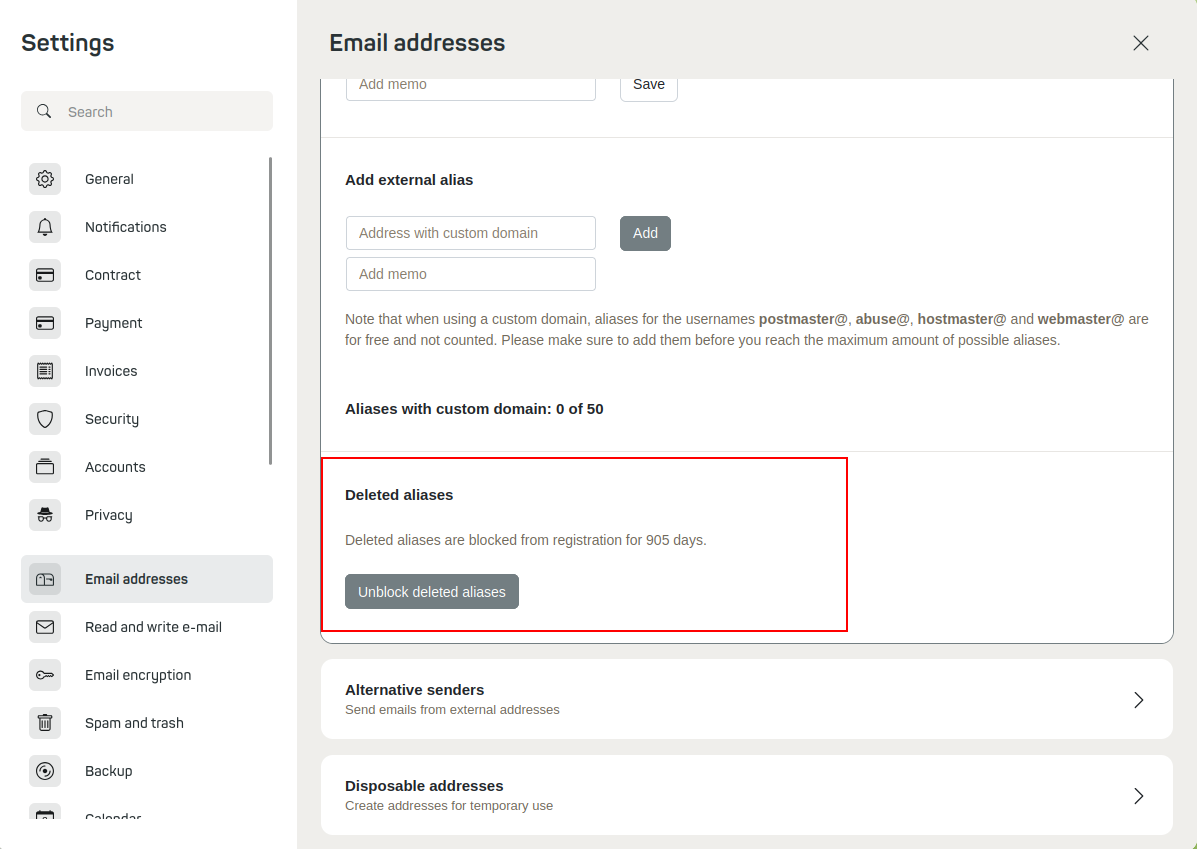
By clicking the Unlock Deleted Aliases button (Figure 3), you have the option to unlock aliases that have already been deleted.

Figure 3: The mailbox block list.
You can now use your former primary address to create a family account or even a completely new, independent account. You can apply the same procedure to transfer old aliases as your new primary address. Simply delete them from the old account and add them again in the new account.
Releasing and Reusing a Former Primary Address
By clicking the button "Remove Deleted Aliases from the Blocklist for New Registrations", you will be directed to the overview of your deleted aliases. There, you can remove the desired alias from the blocklist by clicking the "Delete" button. This immediately makes the alias available again — the originally intended blocking period is lifted.
Note: This button is only displayed if there are deleted aliases still within the blocking period.
Afterward, you can reuse this former primary address, for example, to create a team or family account or a completely new, independent account.
